How can I change the printing area in Someka templates?
All of Someka templates are provided as print-ready. But of course, you may want to make changes according to your own needs. You can change the print areas from Print Settings windows.
Below you can find how to change the printing area in Excel and Google Sheets templates!
1. How can I change the print area in Excel?
Go to View tab on the top Excel menu -> Select Page Break Preview -> Adjust borders as you like
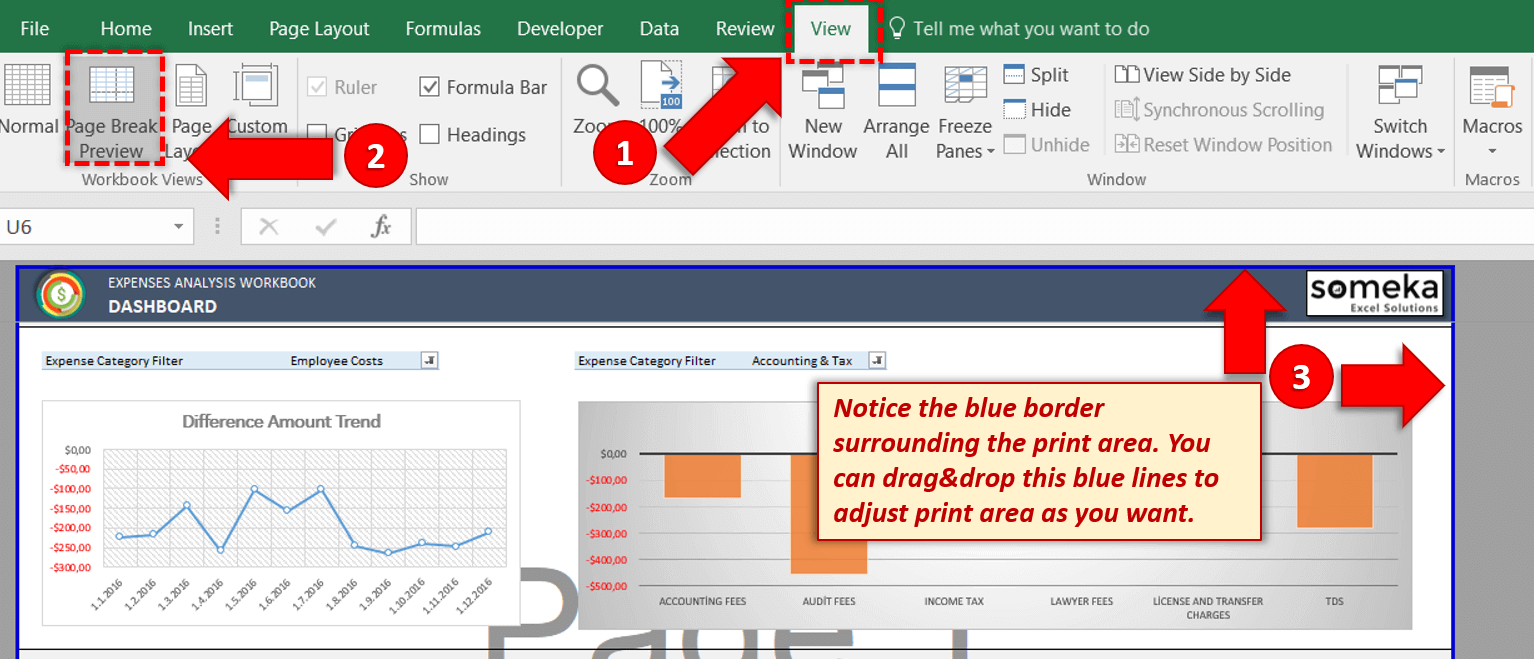
After you make the changes, don’t forget to return to Normal View from the same menu.
What about other print settings in Excel?
When you are in the Page Break View, simply right-click on the page and select Page Setup.
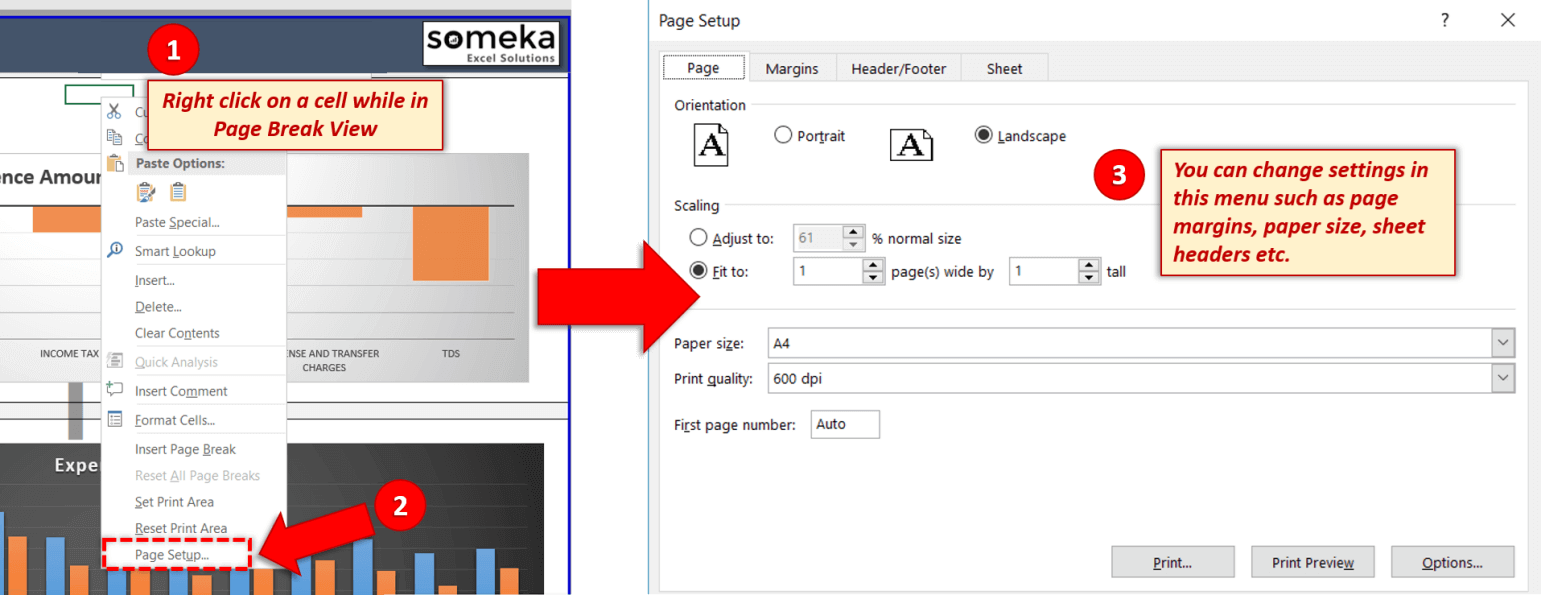
From the Page Setup screen, you can change page margins, adjust the paper size, choose which rows to repeat at the top for multiple page prints, and so on.
** Screenshots in this article were taken in Office 365. If you have a different version, your view might be slightly different. For more comprehensive guidance please see: Microsoft Office Website – Print a worksheet or workbook
2. How Can I change the print area in Google Sheets?
Google Sheets adjust print areas automatically according to the data input. So you don’t need to make any changes when you add new data.
But if you want to print a particular range, then please select the cells that you want to print and then click “CTRL+P” (or go to File > Print) to open the Print Settings window.
Now on the print settings field, select the “Selected cells” option under the Print dropdown list.
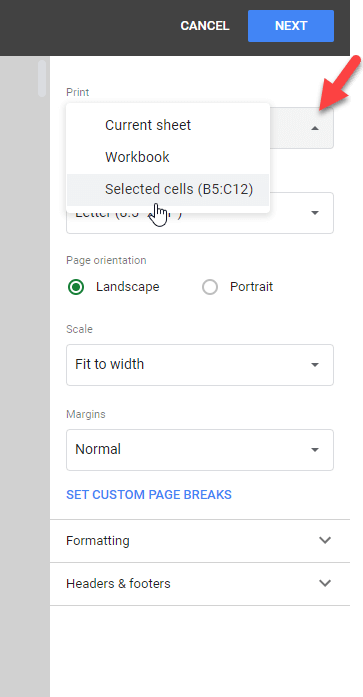
That’s all. Now you can print our any custom range you want.
Go back to FAQ Center