How to Make a Timeline in Excel?
Time management is an essential asset for everyone to achieve desired outcomes in their work. In other words, if you can’t manage your time, your projects will become hazy and confusing. Planning the time of the start and end of each step makes the execution of a project much easier and smoother. This post will focus on how to make a timeline in Excel to help you for better time management.
Different Methods:
- Make Timeline with SmartArt in Excel
- Using Excel Shapes for the Timeline
- Using Borders to Create a Timeline in Excel
- Using Charts to Make a Timeline
- Ready-to-Use Excel Templates
When it comes to working, the key is not in spending it, but in investing it. Therefore, the most successful business people invest in time management skills and it takes them to the top ladder!
5 Different Methods to Build a Timeline in Excel
What is a Timeline?
A timeline is the visual demonstration of events in a certain chronological order on a line that represents the time period.
Why is Excel the best option for creating a timeline?
While there are many choices as software to create a timeline, Microsoft Excel is one of the best options amongst them. First of all, most of us already have Microsoft Office programs on our computers and frequently use it, especially for our work.
If you create a timeline in Excel to send it to your colleagues, you wouldn’t have any risks of them not being able to open the file. Thus, Excel is the most accessible, relatively easier, and more familiar choice out there.
Microsoft Excel lets you create timeline charts in different methods.
Let’s see first in a short tutorial:
In this section we’ll explain how to make a timeline with:
- SmartArt
- Shapes
- Borders
- Charts
- Ready Excel templates
Method 1. Make Timeline with SmartArt in Excel
SmartArt is a Microsoft Office feature to visualize your data and ideas via ready-to-use graphics. SmartArt has many alluring aspects for users. For example:
- It is featured in Microsoft Word, PowerPoint, Excel, and Outlook,
- It is standardized and easily accessible,
- The graphics are customizable,
- It’s easily accessible.
So one of the easiest ways to create a timeline in Excel is to use SmartArt graphics.
To create a SmartArt timeline graphic in Excel, you first need to click on the Insert button on the Excel ribbon. On the Insert tab, you will see the SmartArt button.

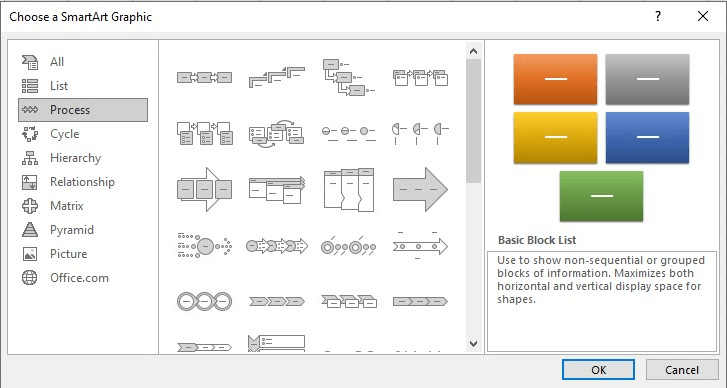
When you click the SmartArt button, the layouts will be listed in a separate window. On the left of the window, the layouts are categorized into certain types such as List, Process, Cycle, Hierarchy, etc.
There are two timeline graphic options in the Process section: Circle Accent Timeline and Basic Timeline. They have different looks, but both have a similar approach to creating a timeline.
Let’s look at each of them below and examine how they work.
1.a. Circle Accent Timeline in SmartArt
Circle Accent Timeline consists of two sizes of circles as its design elements. The big circles suggest more critical events, starts, or deadlines.
Upon clicking on the graphic, a pop-up window, in which you can enter the data, appears. Just enter the names and other important information about the events and your timeline is ready.

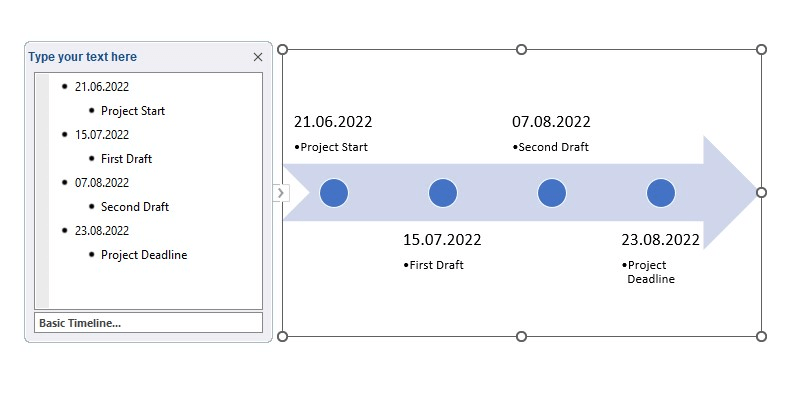
1.b. Basic Timeline in SmartArt
This timeline layout is illustrated as an arrow rather than composed of circles. Still, the characteristics of the timeline are the same with those of the Circle Accent Timeline. All you need to do is to click the Basic Timeline icon on the SmartArt menu and a separate window to enter your data will open alongside the graphic.
Enter the dates, events, and other information, and your timeline is created in a few minutes!
Even though SmartArt is an incredibly easy tool to build a timeline in Excel, there are certain disadvantages as well. The most unfavorable part of this application is that you can’t indicate the dates separately in the timeline, dates can only be written next to the events and other information. Because the time period is not presented in the graphic, the timeline will not look neat and organized as it would be with other options.
Method 2. Using Excel Shapes for the Timeline
Excel spreadsheet presents many great opportunities to do calculations. However, its features are not limited to tables, formulas, and similar customs. You can also design visuals by inserting Shapes into your Excel file. If you are looking for a way to design a timeline, using shapes might be among the best solutions for you.
2.a. Adding shapes
Now all you have to do is add shapes.
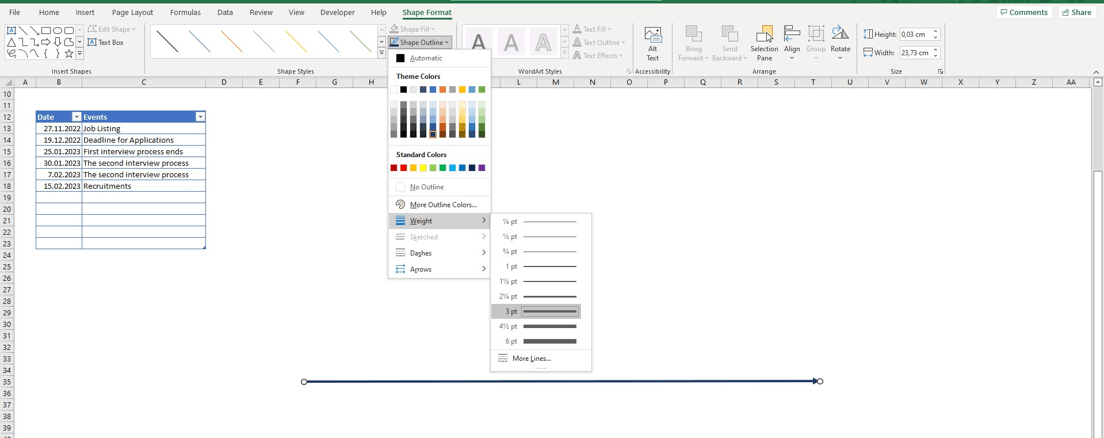
You should first visit the Insert Tab on the ribbon. Then click on the Shapes button and simply choose the shape you want to add to your spreadsheet. The first shape you choose is an arrow shape for a timeline. After selecting the arrow shape, you can change the color and line weight of it from the Shape Format menu on the Excel ribbon. This will be the time axis of your timeline.
2.b. Text boxes
The next step in your design is to add the rectangular shape as your text boxes. Afterward, to add a rectangular shape in Excel, you may follow the aforementioned steps for adding an arrow shape. Instead of choosing an arrow, you will naturally go for the rectangular shape.
2.c. Editing the shapes
You can customize the color and size of the shape as your liking. When you’re done with the editing, copy and paste the shape as many times as you need to. If you have six events, you need six boxes on your timeline. Arrange them on your timeline and connect each of them with a line that you chose from the Shape button.
In the end, your timeline will start to look like this:
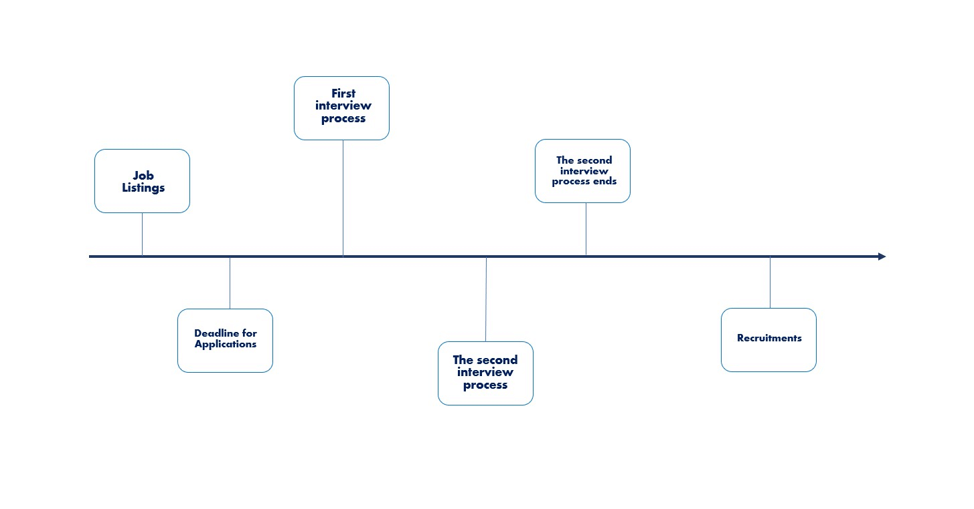
After arranging all the shapes in Excel, go to the Insert tab and click on the Text Box button on the right part of the Insert tab. Enter your first event data into the Text Box and fix it into the first rectangular box from the left. Repeat the same step for each date and event chronologically.
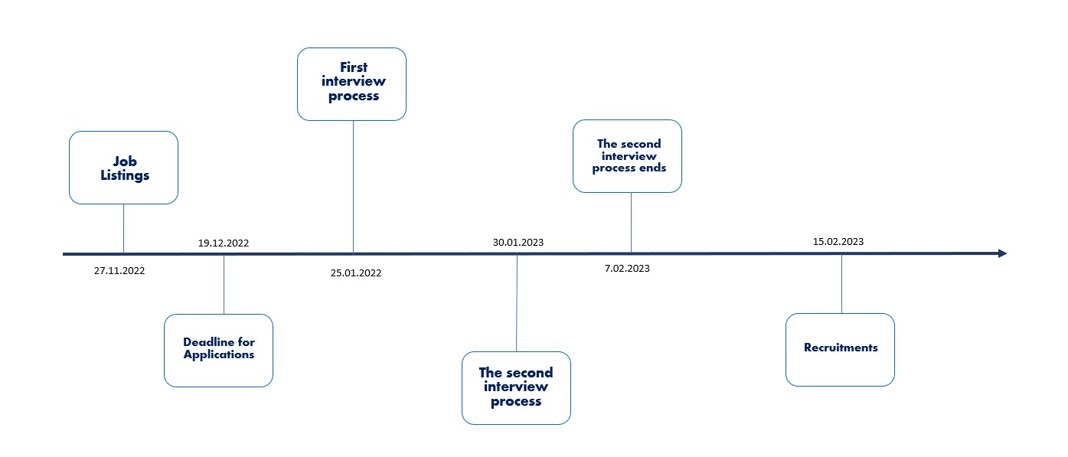
Finally, add each date below their corresponding box and your timeline is almost ready!
Now, your timeline is unified and you can move it or copy-paste it anywhere you’d like to.
Adding shapes together in Excel to build a timeline only requires basic technical knowledge, therefore it is quite simple. However, it is prone to result in many mistakes, because it is highly manual. For the same reason, it takes too much time.
Method 3. Using Borders to Create a Timeline in Excel
Another creative option to create a timeline in Excel is to utilize the spreadsheet characteristic of Excel by painting and adjusting gridlines’ borders. You first need to decide the average width of the timeline.
3.a. Adding the borders
Let’s apply the same data from the last option. In that case, you need six cells painted and tied together. Also, there needs to be some space between the cells, too.
Let’s start with our first cell. Firstly, to paint the borders in Excel, all you need to do is to right-click on the cell that you want to adjust, and select Format Cells on the opening menu. After the Format Cells window opens, enter to Border section. Here you can adjust cell borders’ outlines and colors.

As you first need a baseline for your timeline, select approximately 15 cells in a row and right-click it.
On the Format Cells window, choose the Border tab as it is stated above and select Outline under the Presets title. After that, go to the Border section in the same menu and select the third option which represents the underline of the border. You can also choose the style and the color of the line on the same menu. Click OK and the baseline of the timeline is ready.
3.b. Copying the format
Now, you need to repeat this process for the other elements of the timeline, but don’t worry, there is a shortcut for the boxes! Just create a box above the baseline with the same technique. Above all, you just need to select the entire cell option in the Border part. Then, right-click the cell with the outline and choose Format Painter with the brush icon on the toolbar that is opened. You can paste it to the other cells that you want to outline.
Afterward, write the events chronologically on the outlined cells and your timeline is completed.
Method 4. Using Charts to Make a Timeline
Using charts is a great option to make a timeline in Excel. Because charts are automatically made with the data you’ve given to Excel, they look flawless and they are always accurate. But how can one make a timeline in Excel by using charts?
There are different chart types that you can use to create a timeline in Excel. Let’s build one together.
4.a. Preparing the table
First, create a table that contains the events and the dates. The table should have three columns consecutively for dates, events, and the positions of the events on the timeline. The positions column signifies the exact place of the text according to the horizontal axis of the chart.

4.b. Adding the chart
After setting the table, select the date and position columns without the titles of the column, go to the Insert tab, and click on Insert Column or Bar Chart button on the Charts part of the ribbon. Then choose the first option, Clustered Column, to create a chart.
You can resize the chart as you wish after it appears on the screen.
4.c. Editing the chart
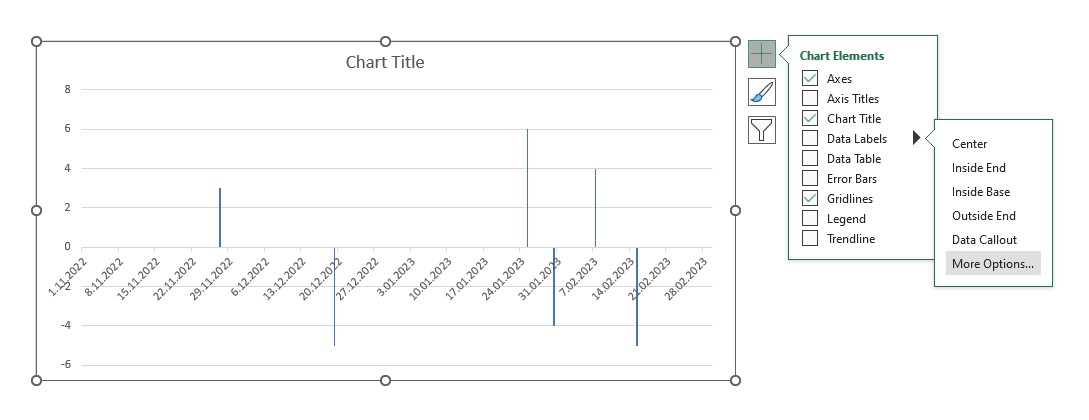
To format the chart, click on the Chart Menu, which looks like a plus sign, on the upper right side of the chart, select Data Labels and More Options. As a result, a side page will open under the title “Format Data Labels”. Here, uncheck the Value option and check the Value From Cells options. You have to select the Events column to enter the data on the “Data Label Range” window and click OK.
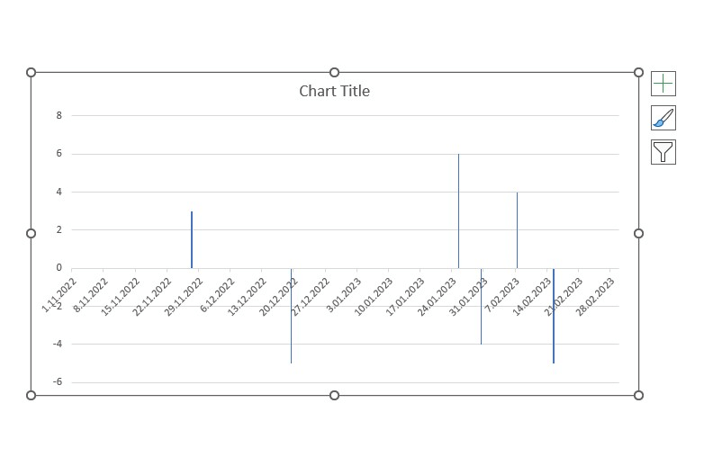
Next, select the columns on the chart to adjust their form. Once again, go to the Chart Menu, click on the right side of the Error Bars option, and choose More Options. This time, the Format Error Page window will be opened on the right side of the spreadsheet.
Here select Minus under Direction, No Cap under End Style, and Percentage under the Error Amount part. Set the percentage to 100%.
Lastly, remove the vertical axis by unchecking Primary Vertical under the Axes option and the gridlines by unchecking the Gridlines option on the Chart menu.

4.d. Adding the lines
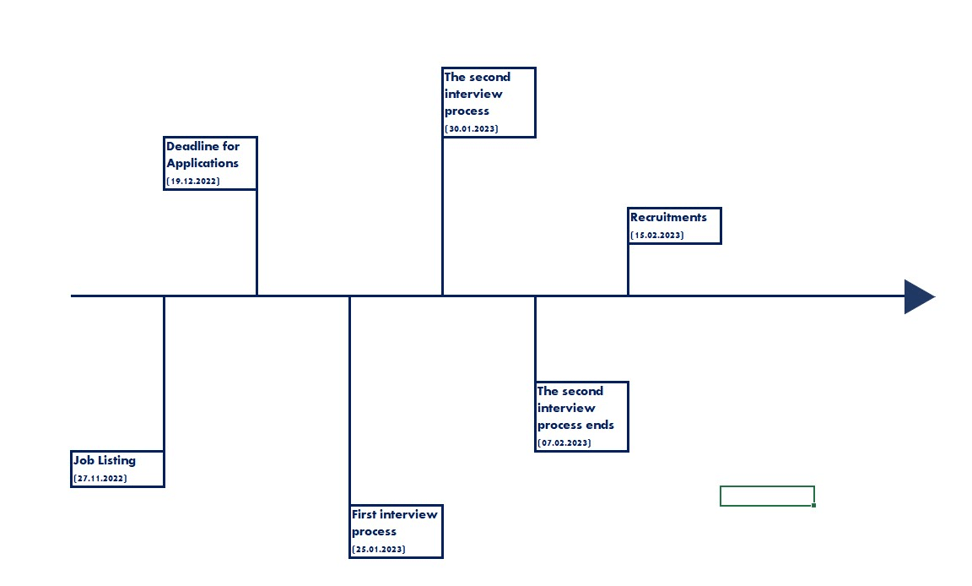
Finally, make the line of the chart as an arrow by selecting the line, going to the Format part of the Chart Tools Tab, and choosing an arrow style from the dropdown Arrows menu.
You can also make other adjustments you want to from the same Format menu such as changing the width of the line and the color.
It was a long ride for sure, but your timeline is ready for you to share!
Method 5. Ready-to-Use Excel Templates
Yes, it is cheeky to suggest our product perhaps, but hear us! All of the options above come with their negatives. As a result, the easy option is also plain looking and it takes quite time to build a timeline that looks professional. You can create a beautiful, professional-looking timeline easily with our Excel Timeline Maker template. All you need to do is to download Someka’s Excel Timeline Template and start to use it in minutes!
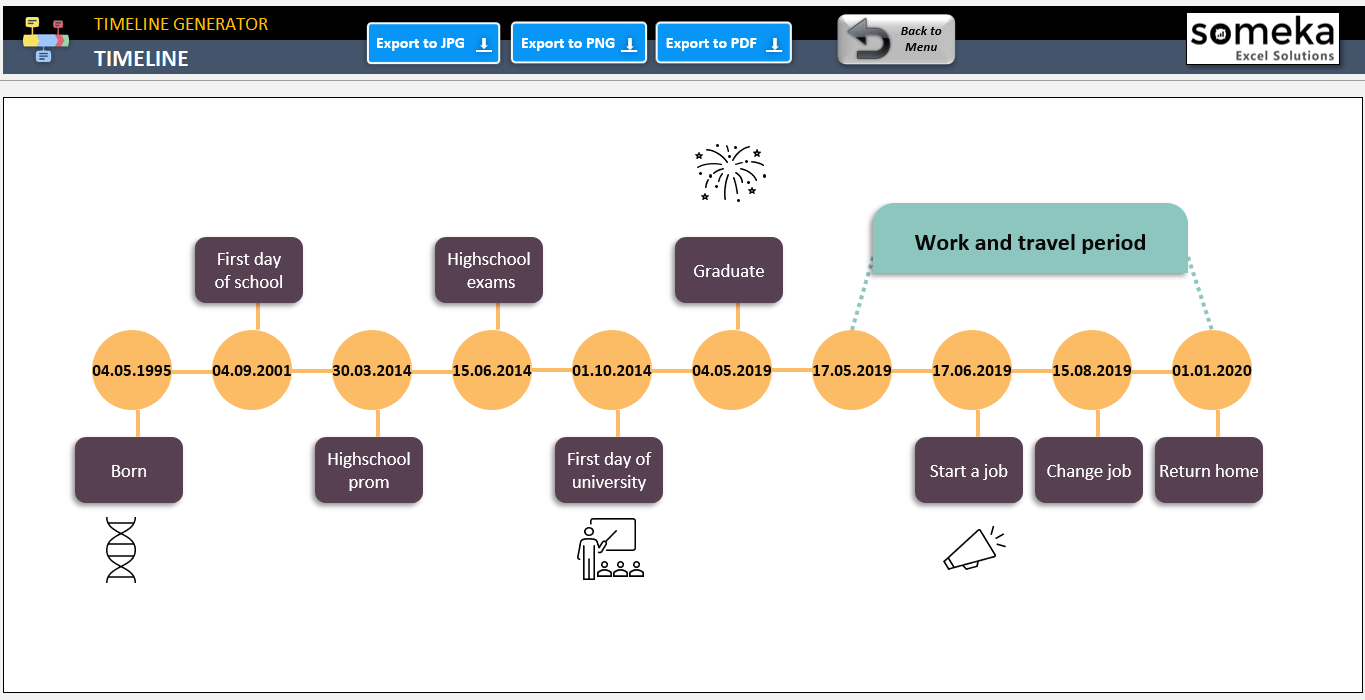
We also offer you a free version for you to try out! This is by far the shortest way to create a nice timeline for your projects in Excel. Do not forget to watch the instructional video to learn more about this template.
In conclusion, this post explains how to make a timeline in Excel step by step with different methods. If you have something to add or if you find any errors, please contact us.
And, don’t forget to check our Excel Templates Collection. There might be very interesting tools for you:
Related Posts